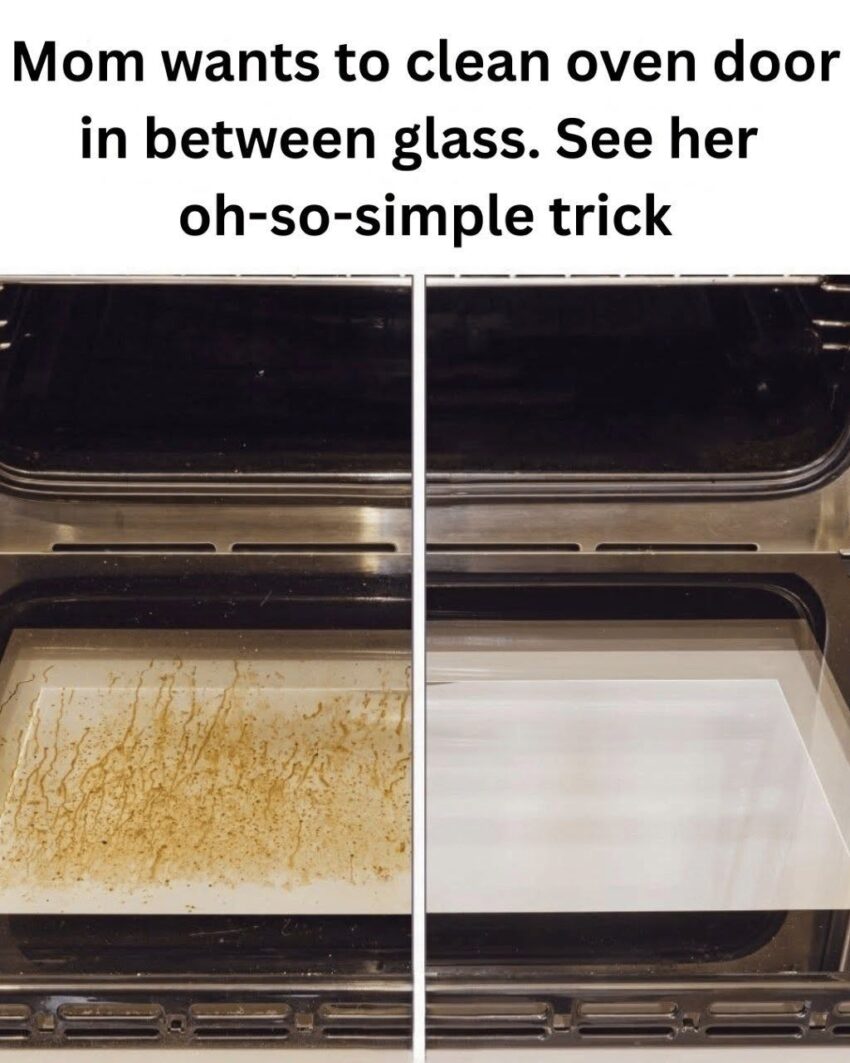
Have you ever cleaned your oven door until the outside glass sparkled, only to discover that it still looked dirty? Those stubborn brown stains, greasy streaks, and cloudy patches trapped between the glass panels can make even a clean kitchen look untidy.
You wipe the outside, scrub the inside, and try every cleaning solution you can find, but the marks remain. That is because the dirt is trapped in a space you cannot reach with an ordinary cloth.
This is where Mom’s oh-so-simple oven door cleaning trick comes in!
Instead of spending hours scrubbing the same glass, you can start by checking whether your oven door allows safe access to the space between its panels. With the right tools, a little patience, and the correct cleaning method for your particular model, you may be able to remove the grime without calling a professional.
The best part? You may already have most of the supplies you need at home.
However, there is one important thing to remember: not every oven door is designed to be opened or cleaned between its glass panels by the user. Before attempting this trick, check your appliance manual to find out how your model should be cleaned.
Why Does Dirt Get Trapped Between Oven Door Glass?
Oven doors often contain two or more glass panels designed to help insulate the oven and keep its exterior temperature under control.
Over time, grease, food splashes, and moisture can accumulate around the door’s edges. Depending on the door’s construction and ventilation design, some residue may find its way into the space between the panes.
This can happen for several reasons:
- Cooking splashes: Grease and food particles can build up around the edges of the door.
- Repeated heating: Heat can bake residue onto surfaces, making stains more difficult to remove.
- Moisture and condensation: Moisture can contribute to cloudy marks and streaks.
- Everyday cooking: Roasting, baking, and cooking fatty foods can gradually leave behind stubborn deposits.
The result is an oven door that looks dirty even after you have cleaned every accessible surface.
Mom’s Simple Trick: How to Clean Between Oven Door Glass
The secret is not an expensive cleaning product or an aggressive scrubbing tool. It is choosing the correct way to access the affected area and cleaning it without damaging the glass, seals, or door mechanism.
What You Will Need
Gather these basic supplies before you begin:
- Two or three clean microfiber cloths
- Warm water
- A small amount of mild dishwashing liquid
- A soft sponge, if recommended by the manufacturer
- A bowl for preparing the cleaning solution
- A flashlight to inspect the door’s edges
- Your oven’s instruction manual
Avoid using abrasive pads, metal scrapers, harsh chemicals, or excessive amounts of water.
Step 1: Turn Off the Oven and Let It Cool Completely
Safety comes first.
Turn off the oven and allow it to cool completely before touching the door or attempting any cleaning. If your oven has recently completed a self-cleaning cycle, wait until the appliance has fully cooled and the manufacturer permits access.
Remove any nearby items that could get in the way, and make sure you have enough room to work comfortably.
Never attempt to remove oven door panels while the appliance is hot.
Step 2: Inspect the Oven Door Carefully
Before trying to reach between the glass panels, examine the door’s edges and consult the manual.
Some oven models have manufacturer-designed access points or removable trim that allow the inner surfaces to be cleaned. Others have sealed glass assemblies that should not be disassembled by the owner.
Look for the cleaning instructions specific to your make and model.
Important: Do not insert a ruler, wire, coat hanger, or other improvised tool through the door vents. These openings may lead to insulation, internal components, or areas that should not be wetted.
If the manual does not describe a safe user-accessible method, stop here and contact the manufacturer or an appliance technician.
Step 3: Prepare a Gentle Cleaning Solution
If your oven’s instructions permit cleaning the accessible surfaces between the glass panels, prepare a simple solution.
Mix warm water with a few drops of mild dishwashing liquid.
Avoid making the mixture excessively soapy. Too much detergent can leave streaks and residue behind.
You do not need to use strong chemicals for ordinary grease deposits. Gentle cleaning is preferable because oven glass, coatings, seals, and surrounding materials can be sensitive to unsuitable products.
Step 4: Clean the Accessible Glass Surface
Use a clean microfiber cloth lightly dampened with the cleaning solution.
Gently wipe the accessible glass surface, paying particular attention to visible grease streaks and cloudy patches.
Do not pour liquid into the door or allow it to collect around the edges. Excess moisture can enter areas containing insulation or other components.
For stubborn residue, let the damp cloth rest against the accessible surface briefly, if permitted by the manufacturer’s instructions, before wiping again.
Avoid vigorous scrubbing, which can scratch the glass or damage nearby components.
Step 5: Wipe Away Soap Residue
Once the visible grime has loosened, use another microfiber cloth dampened with clean water to remove the remaining cleaning solution.
Keep the cloth only slightly damp. Do not spray water directly into the oven door or rinse the internal assembly.
Removing detergent residue is important because leftover soap can create streaks when the glass dries.
Step 6: Dry the Glass Thoroughly
Use a fresh, dry microfiber cloth to wipe the cleaned surface.
Work gently and check the glass from different angles to identify remaining streaks.
If the manufacturer’s instructions require additional drying time before the door is reassembled or the oven is used, follow those instructions carefully.
Do not operate the oven until any required components are correctly secured and the appliance is ready for use.
Step 7: Reassemble Only as Instructed
If your particular oven model has a user-removable trim or cleaning assembly, reinstall every component exactly as described in the manual.
Make sure any retaining clips, screws, seals, or panels are correctly positioned.
If a panel feels difficult to remove or reinstall, do not force it. Oven door glass can be heavy, fragile, and under mechanical tension.
When the design requires specialist disassembly, leave the job to a qualified appliance technician.
Can You Use Baking Soda and Vinegar Between Oven Glass?
Baking soda and vinegar are popular ingredients in homemade cleaning tips, but they are not automatically suitable for every oven door.
Baking soda is mildly abrasive and may scratch certain finishes or coatings if rubbed aggressively. Vinegar is acidic and may be unsuitable for some materials, seals, or surfaces.
Mixing baking soda and vinegar also causes them to react, reducing the effectiveness of their individual cleaning properties.
For ordinary accessible oven glass, a soft cloth and a mild detergent solution are often a more cautious starting point.
Always follow your oven manufacturer’s cleaning recommendations rather than applying a homemade mixture to an unknown surface.
What If Your Oven Door Cannot Be Opened?
Some oven doors are designed with sealed glass assemblies or require specialist procedures for disassembly.
If your model does not have a manufacturer-approved cleaning method for the space between the panes, do not attempt to pry the door apart.
You have several options:
- Consult the manufacturer’s website or instruction manual for model-specific cleaning guidance.
- Contact customer support and ask whether the inner glass can be cleaned by the owner.
- Arrange a qualified appliance technician if grease has accumulated inside a sealed assembly.
Professional assistance may be especially appropriate when the glass is cracked, a seal is damaged, or the door does not close correctly.
Common Mistakes to Avoid When Cleaning Oven Door Glass
Even a simple cleaning task can cause problems if the wrong tools or methods are used.
Using sharp tools
Knives, metal scrapers, and improvised implements can scratch glass, damage seals, or injure your hands.
Spraying cleaner directly into the door
Liquid can enter insulation, vents, and other internal areas. Apply a suitable cleaning solution to a cloth instead, where the manufacturer permits it.
Removing screws without checking the manual
Some screws secure important door components. Removing the wrong ones can cause the glass to shift or the door to become unstable.
Using excessive water
A soaking-wet cloth can allow moisture to enter places that should remain dry.
Forcing the glass panels apart
Oven doors differ in construction, and forcing the panels can cause breakage or injury.
Reassembling the door incorrectly
Improperly secured panels or trim can create a safety hazard. Follow the model-specific instructions and seek professional help if anything does not fit properly.
How to Keep Your Oven Door Cleaner for Longer
Once your oven door looks clean, a few simple habits can help reduce future buildup.
Wipe up accessible spills promptly. Wait until the oven has cooled, then clean spills before they become baked-on deposits.
Clean the inner and outer glass regularly. Use a suitable cleaner and soft cloth according to the manufacturer’s instructions.
Pay attention to the door edges. Grease around accessible edges can accumulate over time, so include these areas in your routine cleaning.
Use suitable cookware. Covered roasting dishes and baking trays can help limit splashes during cooking.
Avoid unnecessary disassembly. Routine maintenance is easier and safer when you follow the appliance’s intended cleaning procedure.
Check the manual before using specialized cleaners. Some glass coatings and door finishes require specific products or methods.
A few minutes of regular maintenance can make deep cleaning less frequent and much easier.
Frequently Asked Questions
1. Can I clean between oven door glass without removing the door?
Sometimes. The answer depends on your oven’s design. Some models provide approved access to the glass surfaces, while others require professional disassembly. Check your manual before attempting either method.
2. Is it safe to use a cloth attached to a ruler?
Not unless your oven manufacturer specifically recommends a suitable tool and method. Pushing an improvised tool through the vents can damage insulation, seals, or internal components.
3. Can I use glass cleaner between oven door panels?
Only if the manufacturer approves that product for the specific surfaces and assembly. Some glass cleaners contain ingredients that may be unsuitable for certain coatings or internal components.
4. Why does my oven door still look cloudy after cleaning?
Cloudiness may come from detergent residue, baked-on grease, mineral deposits, or damage to the glass or its coating. If gentle, approved cleaning does not improve the appearance, ask the manufacturer or a technician to assess the glass.
5. How often should I clean between oven door glass?
There is no universal schedule. Clean it when buildup becomes noticeable, provided your oven has a manufacturer-approved user cleaning procedure. Regularly cleaning accessible surfaces can help prevent stubborn deposits.
6. Can I remove the oven door myself?
Some ovens are designed to allow the door to be removed by the owner using a specific procedure. Others require specialist handling. Follow the instructions for your exact model, and do not attempt removal if the procedure is unclear.
Final Thoughts
Cleaning the space between oven door glass can seem like an impossible task, especially when grease and brown stains remain visible after you have cleaned the rest of the appliance.
Mom’s simple trick is to start with the right access method, use a gentle cleaning solution, and work patiently rather than scrubbing harder.
The most important step is checking whether your oven is designed for owner cleaning between its glass panels. With the correct instructions and a few basic supplies, some models can be cleaned without specialist assistance. Others are best left to a qualified technician.
Remember: clean smarter, not harder—and never force an oven door apart just to reach a stubborn stain.
A little patience and the right method can help keep your kitchen looking cleaner while protecting your appliance.