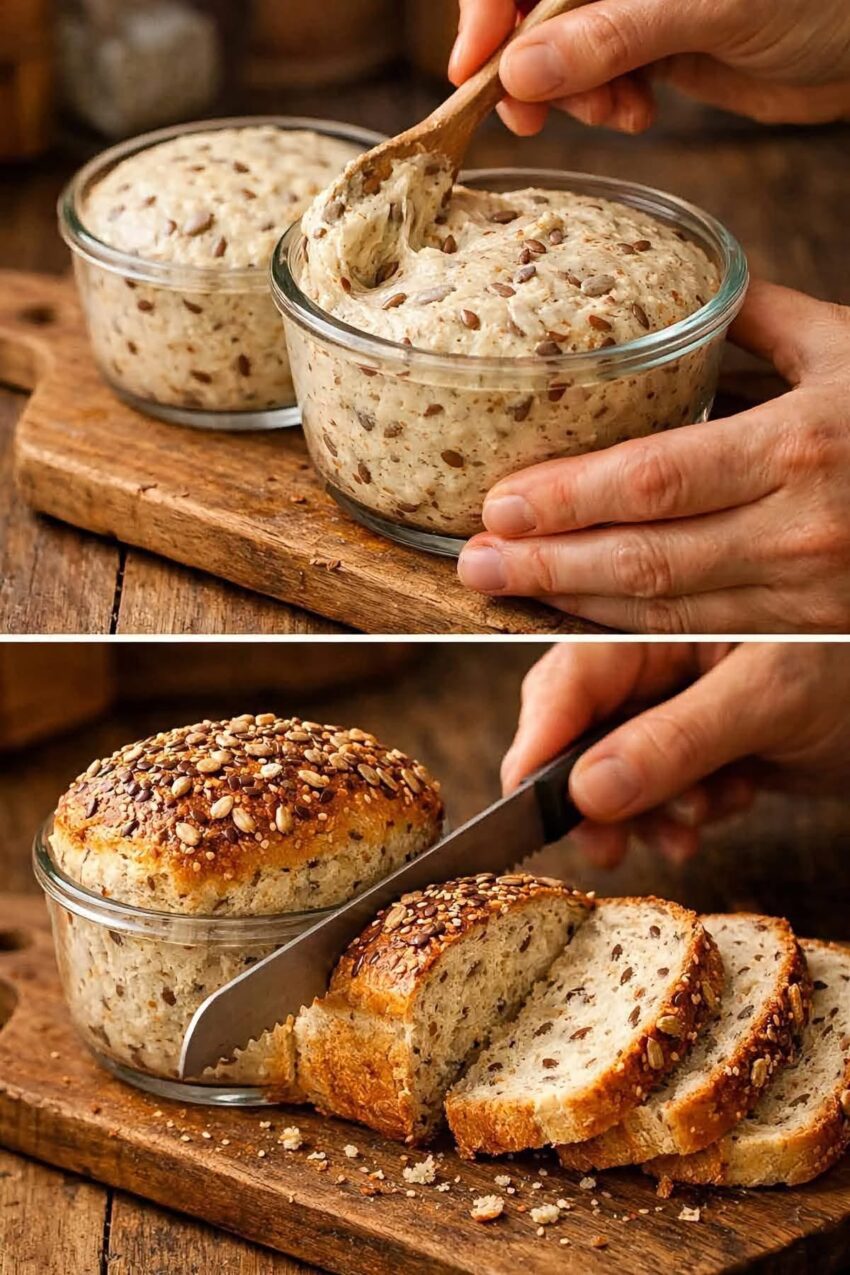
Learn how to make soft, fluffy bread in a jar with simple ingredients and easy steps. Discover baking tips, storage advice, and important food-safety precautions for homemade jar bread.
Have you ever imagined baking your own bread in a glass jar? Bread in a jar is a creative way to prepare individual portions of homemade bread, making it perfect for breakfast, snacks, or a thoughtful homemade food gift.
The idea is simple: prepare a bread dough, bake it in a suitable oven-safe container, and enjoy freshly baked bread in a charming little jar. However, choosing the right container and following safe baking practices are essential.
This recipe creates soft, tender mini loaves without requiring a bread machine or complicated equipment.
Ingredients
- 3 cups all-purpose flour
- 2¼ teaspoons active dry yeast (one standard packet)
- 1 cup warm water, approximately 105–110°F (40–43°C)
- 2 tablespoons sugar
- 2 tablespoons olive oil or melted butter
- 1 teaspoon salt
- 2–4 tablespoons additional flour, if needed
Equipment You’ll Need
- A large mixing bowl
- Measuring cups and spoons
- A wooden spoon or spatula
- Oven-safe baking jars or small oven-safe ramekins
- A baking tray
- A clean kitchen towel
Important: Use only containers explicitly rated for oven baking. Ordinary mason jars, decorative jars, and jars with narrow openings may crack or may not be suitable for this purpose. Never use a sealed jar for baking.
Step-by-Step Instructions
Step 1: Activate the Yeast
Pour the warm water into a mixing bowl. Add the sugar and yeast, then stir gently.
Let the mixture stand for about 5–10 minutes. If the yeast is active, a light foam should form on the surface.
The water should be warm, not hot, because excessive heat can damage the yeast.
Step 2: Make the Dough
Add the olive oil, salt, and approximately 2½ cups of flour to the yeast mixture. Stir until a rough dough forms.
Gradually add the remaining flour until the dough becomes soft and slightly tacky without being excessively sticky.
Step 3: Knead the Dough
Transfer the dough to a lightly floured surface. Knead for about 8–10 minutes until it becomes smooth and elastic.
If you press a finger gently into the dough, it should slowly spring back.
Step 4: Let the Dough Rise
Place the dough in a lightly oiled bowl and cover it with a clean kitchen towel.
Leave it in a warm place for approximately 60–90 minutes, or until it has doubled in size.
The exact time will depend on the room temperature and the activity of the yeast.
Step 5: Prepare the Baking Containers
Preheat the oven to 350°F (175°C).
Lightly grease small, oven-rated baking containers. If using jars, make sure the manufacturer specifically states that they are suitable for oven baking.
Do not use lids during baking, and avoid containers with chips, cracks, or sudden temperature changes.
Step 6: Fill the Containers
Gently press the risen dough to release excess air. Divide it into portions and shape each portion into a small loaf.
Fill each container only about one-third full, leaving plenty of space for the dough to expand.
Cover loosely with a clean towel and let the dough rise again for approximately 20–30 minutes.
Step 7: Bake the Bread
Place the containers upright on a baking tray and transfer them carefully to the oven.
Bake for approximately 20–30 minutes, depending on the size and shape of the containers. Begin checking early, as narrow or deep containers may bake differently from ordinary loaf pans.
The bread should be golden on top and fully cooked in the center. For a typical wheat loaf, an internal temperature around 190–200°F (88–93°C) is a useful doneness check.
If the outside browns before the center cooks, lower the temperature slightly and continue baking until done.
Step 8: Cool Before Serving
Remove the containers from the oven using oven mitts. Place them on a heat-resistant surface and allow them to cool.
Never place hot glass containers on a cold or wet surface, and do not refrigerate them while they are still hot.
For easier removal, let the bread cool sufficiently and gently loosen the edges if the container’s shape permits. Serve warm with butter, jam, or your favorite spread.
Delicious Variations
Garlic Herb Bread
Add minced garlic, dried oregano, and parsley to the dough for a savory mini loaf.
Cheesy Bread
Fold a small amount of grated cheddar or mozzarella into the dough before shaping. Make sure the center is thoroughly cooked.
Cinnamon Bread
Add cinnamon and a little extra sugar for a sweeter breakfast loaf.
Whole-Wheat Bread
Replace up to half the all-purpose flour with whole-wheat flour. You may need a little extra water because whole-wheat flour absorbs more liquid.
Food-Safety Tips for Bread in a Jar
Bread baked in a jar should not automatically be treated as shelf-stable canned bread.
- Never seal a jar while baking.
- Do not assume that a vacuum seal makes bread safe for long-term storage at room temperature.
- Cool the bread and store it in a clean, suitable food container.
- For best quality, consume homemade bread within a few days or freeze it for longer storage.
- Discard bread showing mold or unusual spoilage; do not simply remove the visible mold.
Traditional home-canned bread recipes are not considered a safe substitute for validated food-preservation methods.
Frequently Asked Questions
Can I use ordinary mason jars?
Not unless the manufacturer specifically confirms that the jars are suitable for oven baking. Many glass jars are intended for canning or storage rather than direct oven heat.
Can I preserve bread in a jar for months?
No. Simply baking bread in a jar and sealing it does not make it safe for long-term room-temperature storage. Freeze the bread if you want to keep it longer.
Can I make this recipe without yeast?
Yes, but the result will be more like a quick bread than a traditional fluffy yeast loaf. You would need a different recipe using baking powder or baking soda.
Can I use an air fryer?
Possibly, if the container is rated for the air fryer’s temperature and fits with adequate airflow. Cooking time will vary, so check the center for doneness.
Final Thoughts
Bread in a jar is a fun way to make small homemade loaves using everyday baking ingredients. With a simple yeast dough, a little patience, and the right oven-safe containers, you can enjoy fresh bread in individual portions.
Remember that the jar is simply the baking vessel, not a preservation method. Choose suitable containers, allow the bread to cook fully, and store it safely after baking for the best results.