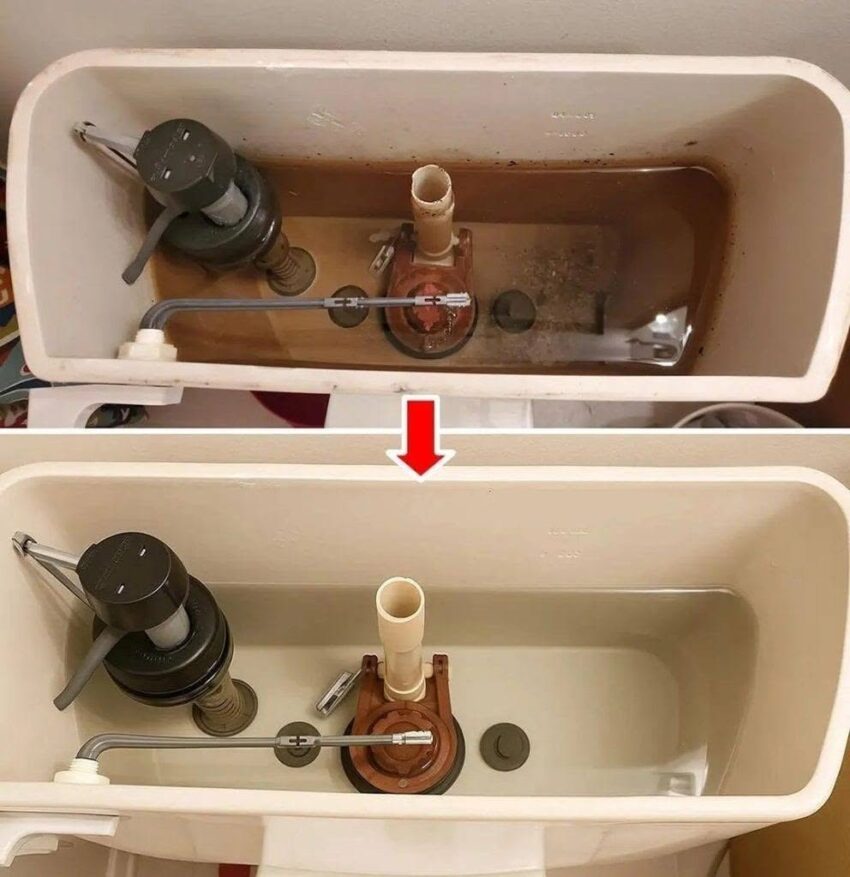
The toilet flush is one of the most frequently touched parts of the bathroom, yet it is often overlooked during routine cleaning. Over time, dust, soap residue, water spots, fingerprints, limescale, and grime can build up around the flush button or handle, making even a clean toilet look old and neglected.
The good news is that you don’t need expensive equipment to restore its appearance. With the right cleaning method and a little attention to detail, you can make your toilet flush look clean, shiny, and almost new again.
This guide explains how to clean different types of toilet flushes safely, remove stubborn mineral deposits, restore shine, and prevent buildup from returning.
Why Does the Toilet Flush Get Dirty?
The flush button or handle is touched frequently, often with wet hands. This makes it easy for fingerprints, oils, dust, and bathroom residue to accumulate.
Hard-water areas can create another problem: limescale and mineral deposits. These may appear as:
- White or chalky marks
- Yellowish stains
- Dull patches
- Greenish or bluish deposits around metal fittings
- Water spots around the flush button
- Grime trapped around the edges of the button
If the flush is made from chrome or another shiny finish, even a small amount of buildup can make it look dull.
What You Need
For normal cleaning, gather:
- A microfiber cloth
- An old soft toothbrush
- Warm water
- Mild dish soap or a suitable bathroom cleaner
- White vinegar for mineral deposits, provided the manufacturer’s instructions allow it
- A small bowl
- Rubber cleaning gloves
- A dry microfiber cloth
For stubborn buildup, a bathroom limescale remover can also be used, but always check that it is suitable for the material and follow the product label.
Important: Never mix bleach with vinegar, acidic cleaners, ammonia, or other cleaning products. Such combinations can release dangerous gases.
Step 1: Remove Dust and Loose Dirt
Before using any liquid cleaner, wipe the flush button or handle with a dry microfiber cloth.
Pay particular attention to:
- Around the edge of the flush button
- The gap between a button and its surrounding plate
- Around the base of a flush handle
- The area where the handle enters the toilet tank
- Any seams or grooves
Removing loose dirt first prevents you from simply spreading it around when you start wiping.
Step 2: Clean With Mild Soap
Add a few drops of mild dish soap to warm water.
Dip your microfiber cloth into the solution and wring it out well. The cloth should be damp rather than dripping wet.
Gently wipe the entire flush surface.
For a flush button, move the cloth around the button and carefully clean its outer rim. For a handle, wipe both the handle and the area surrounding its base.
A soft toothbrush can help clean narrow gaps and grooves. Use gentle pressure so you don’t scratch the finish.
Why use a soft cloth?
Shiny chrome and other bathroom finishes can become scratched by abrasive pads, steel wool, or harsh scrubbing. A soft microfiber cloth is generally a safer choice for routine cleaning.
Step 3: Remove White Limescale and Water Marks
If your flush has white, chalky or crusty deposits, the problem may be mineral buildup rather than ordinary dirt.
White vinegar can help dissolve mineral deposits because its acidity can break down limescale. However, vinegar should only be used when it is compatible with the finish and the toilet manufacturer’s care instructions. Vinegar can damage some materials and finishes with repeated or prolonged exposure.
A simple method:
- Put a small amount of white vinegar on a cloth.
- Apply the damp cloth to the affected area.
- Leave it for a short period rather than allowing it to dry completely.
- Gently wipe the deposit away.
- Wipe the area again with clean water.
- Dry thoroughly with a microfiber cloth.
For stubborn deposits, repeat the process rather than aggressively scrubbing.
Do not use vinegar if the surface manufacturer’s instructions prohibit acidic cleaners.
Step 4: Clean the Edges and Hidden Areas
This is the step that can make the biggest visual difference.
Even when the top of the flush button looks clean, grime can remain around its edges.
Take a soft toothbrush and gently clean:
- Button edges
- Grooves
- Screw or fitting areas
- Handle joints
- The underside of the flush handle
- The narrow gap around the flush plate
Work slowly and use only enough pressure to loosen the dirt.
Afterward, wipe everything with a clean, damp microfiber cloth.
Step 5: Rinse Away Cleaning Residue
Don’t leave cleaning products sitting on the surface.
Use a clean microfiber cloth dampened with plain water and wipe the flush thoroughly.
This removes leftover soap or cleaning solution and helps prevent streaks.
If you have used a commercial cleaner, follow its label instructions for rinsing and surface compatibility.
Step 6: Dry and Polish
Here’s the simple trick that gives the flush that “just cleaned” appearance.
Take a completely dry microfiber cloth and polish the surface gently.
Use small circular movements on shiny surfaces and pay special attention to:
- Water spots
- Fingerprints
- Streaks
- Edges
- Chrome fittings
Drying the surface immediately also helps prevent new water marks.
A clean flush should look dry, even, and free from visible residue, rather than simply wet and shiny.
How to Clean a Toilet Flush Button
Push-button toilets need a little extra attention because dirt can collect around the button.
Follow these steps:
- Wipe the button with a dry cloth.
- Clean the surrounding plate with diluted mild soap.
- Use a soft toothbrush around the button’s edge.
- Treat visible mineral deposits with an appropriate limescale method.
- Wipe with clean water.
- Dry and polish with microfiber.
Avoid forcing liquid into the mechanism or flooding the area around the button.
If the button becomes sticky, doesn’t return properly, or the flush mechanism starts behaving differently after cleaning, stop and check the toilet manufacturer’s instructions rather than spraying more cleaner into the mechanism.
How to Clean a Toilet Flush Handle
Traditional flush handles can collect grime around the point where the handle connects to the toilet tank.
Clean it by:
- Wiping the handle with warm soapy water.
- Cleaning around its base with a soft toothbrush.
- Removing mineral deposits carefully.
- Wiping away cleaning residue.
- Drying the handle completely.
If the handle is loose, rusty, or difficult to operate, cleaning may not solve the problem. It may need adjustment or replacement.
What About Cleaning Inside the Toilet Tank?
It’s tempting to pour vinegar or another cleaner directly into the toilet tank, but this isn’t something you should do automatically.
Toilet tanks contain valves, seals, coatings, and other components that can be affected by certain chemicals. Some manufacturers specifically restrict or discourage the use of in-tank cleaning products.
Before putting any chemical into the tank, check the toilet manufacturer’s instructions.
For routine cleaning, focus on the accessible exterior surfaces unless the manufacturer provides specific instructions for cleaning the inside of the tank.
Common Mistakes to Avoid
1. Mixing Bleach and Vinegar
Never do this.
Bleach and vinegar can react to produce chlorine gas, which can irritate the eyes and respiratory system and cause breathing problems.
The same principle applies to bleach and acidic toilet cleaners.
2. Using Steel Wool
Steel wool and harsh abrasive pads can scratch shiny bathroom finishes.
Once a surface becomes scratched, it can become harder to keep clean and may permanently lose its original appearance.
3. Using Too Much Cleaner
More cleaner doesn’t necessarily mean a cleaner toilet.
Excess product can leave a sticky or cloudy residue. Use the amount recommended on the product label.
4. Ignoring the Edges
A quick wipe across the top of the flush button won’t remove buildup around its edges.
Use a soft toothbrush for those difficult areas.
5. Leaving the Surface Wet
Water left behind can dry into spots, especially in hard-water areas.
Always finish by drying the flush with a clean microfiber cloth.
How to Make the Toilet Flush Stay Clean Longer
Once you’ve restored the flush, keeping it clean is much easier.
Try this simple routine:
Every few days:
Wipe the flush button or handle with a damp microfiber cloth.
Once a week:
Clean it with mild soapy water and wipe around the edges.
When you see mineral deposits:
Treat them promptly with a suitable limescale-removal method rather than waiting until the buildup becomes thick.
After cleaning:
Dry the surface completely to reduce water spots.
Regular light cleaning is usually easier than trying to remove months of accumulated buildup in one session.
The Final “Like-New” Check
After cleaning, inspect the flush from different angles.
Look for:
- White mineral deposits
- Fingerprints
- Soap residue
- Water spots
- Dirt around the edges
- Dull or cloudy areas
- Grime around the handle or button
Give the surface one final wipe with a dry microfiber cloth.
The result should be a clean, dry and polished flush that complements the rest of your freshly cleaned toilet.
Final Thoughts
Cleaning a toilet flush doesn’t have to be difficult. The key is to clean gently, target mineral buildup carefully, pay attention to hidden edges, and dry the surface properly.
For everyday maintenance, mild soap and a microfiber cloth are often enough. For hard-water stains, use an appropriate descaling method only when it is safe for the particular finish.
Most importantly, never mix cleaning chemicals. Bleach should not be combined with vinegar, ammonia, acidic toilet cleaners, or other household cleaners because dangerous chemical reactions can occur.
With a few minutes of regular care, your toilet flush can stay bright, clean and fresh-looking for much longer.