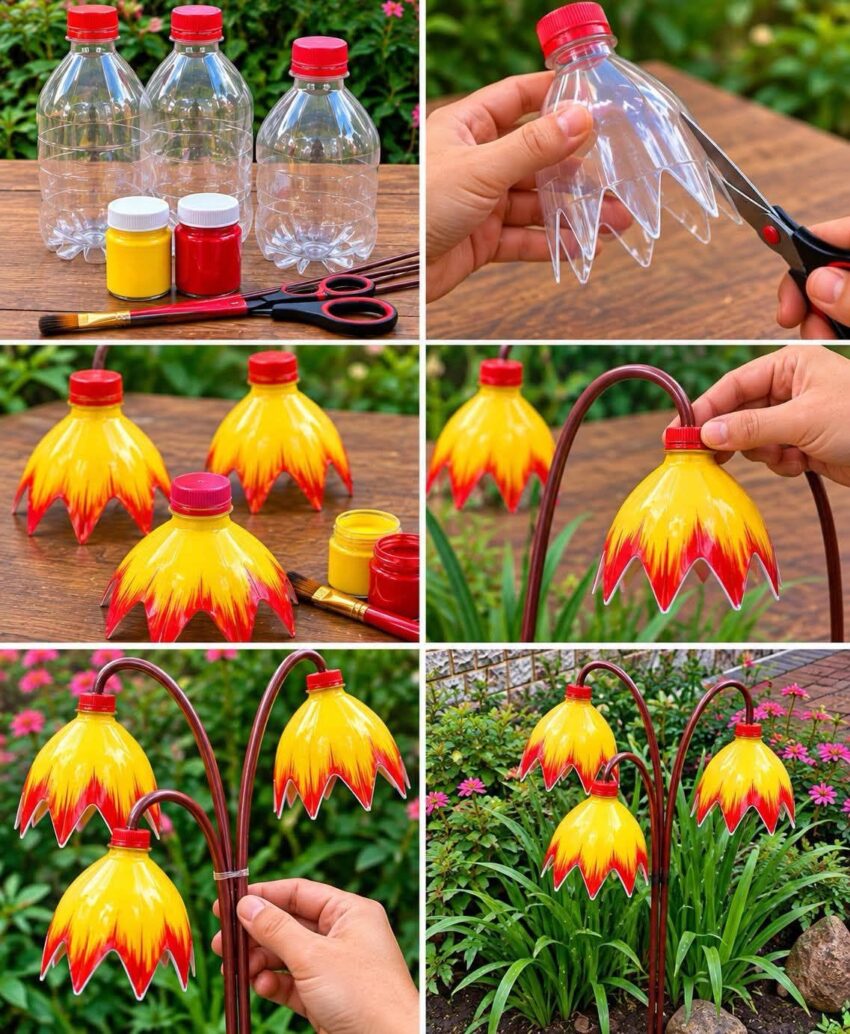
Turn empty plastic bottles into colorful garden decorations with acrylic paint. This simple DIY project is affordable, creative, and a fun way to reuse household items.
Have you ever looked at an empty plastic bottle and wondered whether it could become something more useful?
Instead of throwing bottles away, you can turn them into colorful decorations for your garden, balcony, patio, or even a small indoor plant corner.
With a few empty bottles, some acrylic paints, and a little creativity, ordinary containers can be transformed into cheerful pieces of garden art.
The best part is that you don’t need to be an experienced artist. Simple patterns, bright colors, flowers, leaves, dots, and playful designs can make a surprisingly beautiful result.
What You’ll Need
For this DIY project, you can keep the materials simple.
Basic supplies:
- Empty plastic bottles
- Acrylic paints
- Paintbrushes in different sizes
- Pencil or marker
- Scissors or a craft knife
- Strong glue, if needed
- Clear protective sealant suitable for outdoor use
- Optional decorative items such as ribbons, beads, or artificial flowers
Make sure bottles are thoroughly washed and completely dry before you begin.
Step 1: Clean and Prepare the Bottles
Start by removing labels, adhesive residue, and any remaining liquid.
Wash the bottles with warm soapy water and allow them to dry completely.
Decide how you want to use each bottle. You could leave it intact as a hanging decoration, cut it into a planter, or shape it into a decorative object.
If you’re cutting plastic, take extra care because the edges can become sharp. Children should have adult supervision during this part of the project.
Step 2: Choose Your Design
This is where you can let your creativity take over.
You don’t need a complicated design.
Some simple ideas include:
- Colorful flowers
- Polka dots
- Leaves and vines
- Butterflies
- Ladybugs
- Geometric patterns
- Smiley faces
- Stripes
- Simple floral patterns
You can sketch the design lightly with a pencil or marker before painting.
Step 3: Start Painting
Acrylic paint works well for many craft projects because it is versatile and available in a wide variety of colors.
Start with the larger areas first.
For example, if you’re creating a flower-shaped decoration, paint the main background before adding smaller details.
Allow each layer to dry before applying another color. This helps prevent the colors from mixing unintentionally.
Step 4: Add the Details
Once the base layer is dry, add smaller details.
A thin brush can be useful for:
- Flower petals
- Leaf veins
- Outlines
- Small dots
- Facial features
- Decorative patterns
You don’t have to make every piece perfectly symmetrical.
In fact, the handmade appearance is part of the charm.
Step 5: Protect Your Decoration
If the finished piece will remain outdoors, consider applying a clear protective coating that is specifically suitable for the material and outdoor conditions.
Acrylic paint can weather over time when exposed to sunlight, rain, and changing temperatures.
A suitable outdoor sealant may help protect the painted surface, although no coating will make a craft completely weatherproof forever.
Always follow the instructions on the product you use and allow it to dry properly before placing the decoration outside.
Turn Bottles Into Mini Planters
One of the most practical versions of this project is turning plastic bottles into small planters.
You can cut the bottle carefully, decorate the outside with acrylic paint, and add drainage holes where appropriate.
Then fill it with suitable potting soil and choose a small plant that fits the container.
Herbs, flowers, and some small ornamental plants can work well depending on the size and shape of the bottle.
Remember that plants need adequate drainage. Without drainage holes, excess water can collect around the roots and cause problems.
Make a Colorful Hanging Garden
Another creative option is to turn decorated bottles into hanging containers.
Paint several bottles using different designs and arrange them together.
You can create a small vertical garden along a balcony, fence, or suitable outdoor wall.
This can be especially useful when you don’t have a large garden but still want to add greenery to your space.
Make sure hanging containers are securely attached and aren’t positioned where they could fall on people or damage property.
Why This DIY Idea Is So Appealing
There are several reasons bottle crafts have become popular.
It’s inexpensive
The main material is something many households already have.
It’s creative
You can choose your own colors, patterns, and shapes.
It’s customizable
Your decoration doesn’t have to look like anyone else’s.
It’s a fun family activity
Painting and decorating can be an enjoyable weekend project, although cutting tools and certain craft materials should be handled by adults.
It gives old items another purpose
Instead of immediately throwing away a suitable container, you can find another use for it.
Don’t Be Afraid to Keep It Simple
You don’t need expensive craft supplies to create attractive garden décor.
A bottle painted in two or three complementary colors can look just as charming as a complicated design.
Sometimes simple flowers, dots, or stripes are enough to transform an ordinary object.
The goal isn’t perfection.
The goal is to create something that adds personality to your garden.
Final Thoughts
Empty bottles don’t have to become boring household waste.
With a little acrylic paint and some imagination, they can become colorful planters, hanging decorations, garden ornaments, or playful pieces of outdoor art.
The next time you have an empty bottle, pause before throwing it away.
You may already have the basic material for your next DIY garden project sitting in your recycling bin.